How-to Guides
Invite teammates
Create user groups with per-cluster access, then invite teammates as Members (scoped through groups) or Admins (full access).
You've connected a cluster and the data looks right. The finance partner needs read-only access to dashboards, two SREs need to triage alerts on the payments cluster, and the platform lead needs to manage everything. Three invites, three different scopes. This guide walks the round trip — including how user groups carry the per-cluster access for Members, and why Admins skip groups entirely.
Plan ten minutes the first time through (you'll create at least one group). Repeat invites take about two minutes per person.
1. Open Access Management
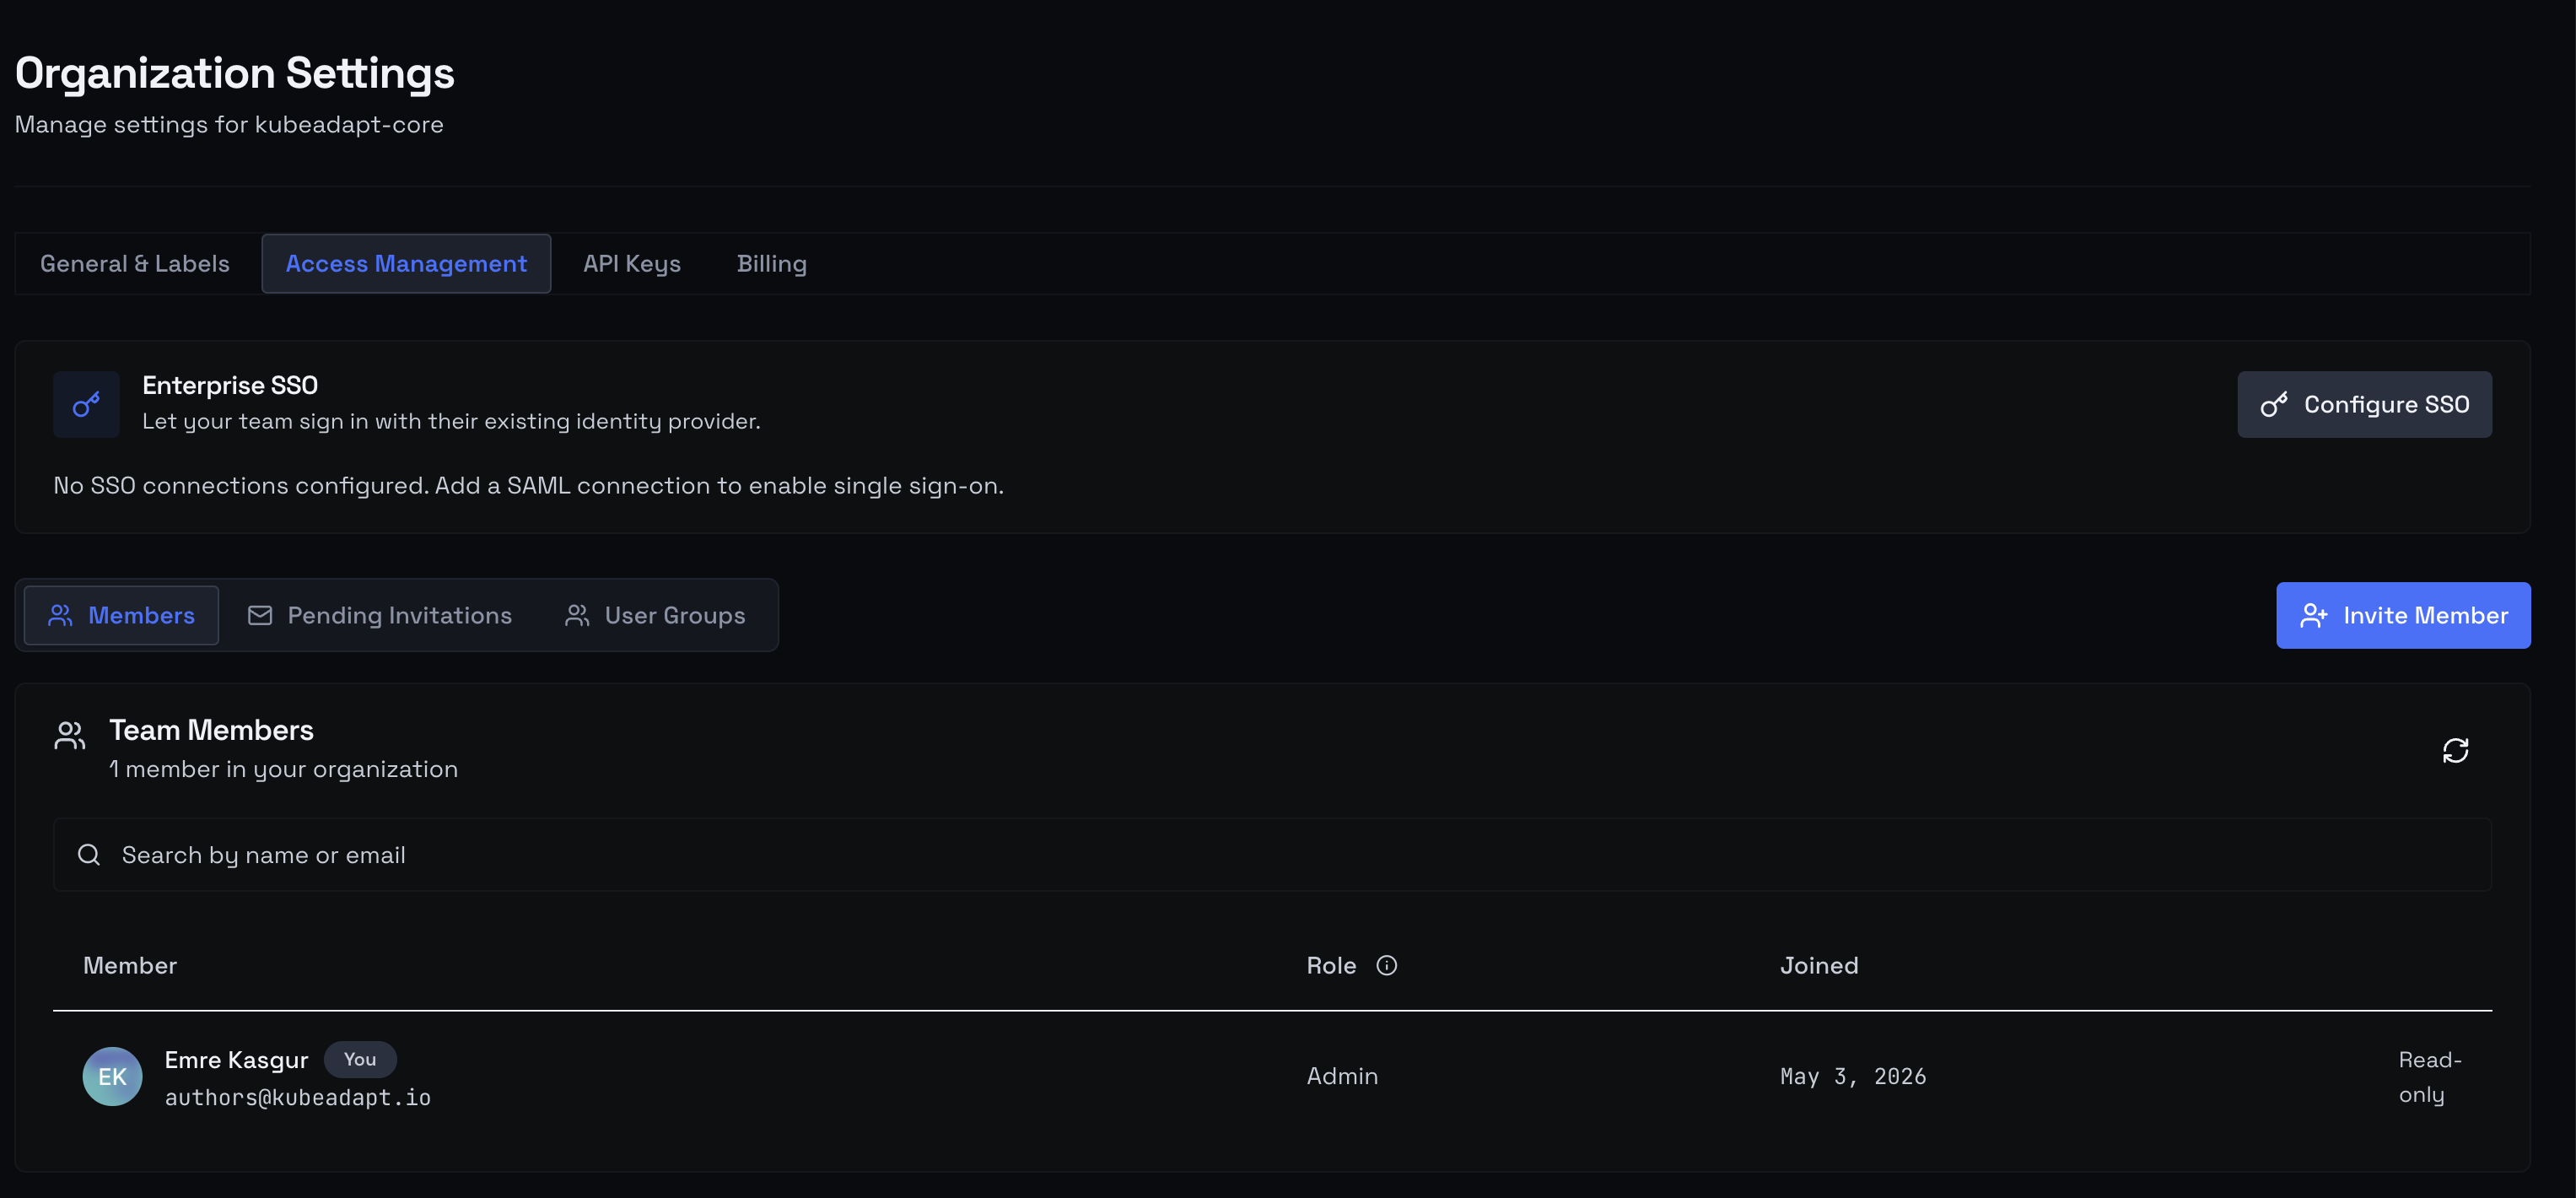 Access Management — Members, Pending Invitations, and User Groups tabs
Settings → Access Management. The page splits three ways:
- Members — current users in the org.
- Pending Invitations — invites sent but not yet accepted (count badge on the tab).
- User Groups — reusable bundles that carry per-cluster access for Members.
You need to be an Admin (or the Owner) to invite teammates or to create groups. Members can't manage other members.
2. Create at least one user group
If you're going to invite anyone with the Member role, they must land in at least one group — the invite dialog refuses to send otherwise. Admins skip groups entirely, so if your first teammate is going to be an Admin, jump straight to step 3.
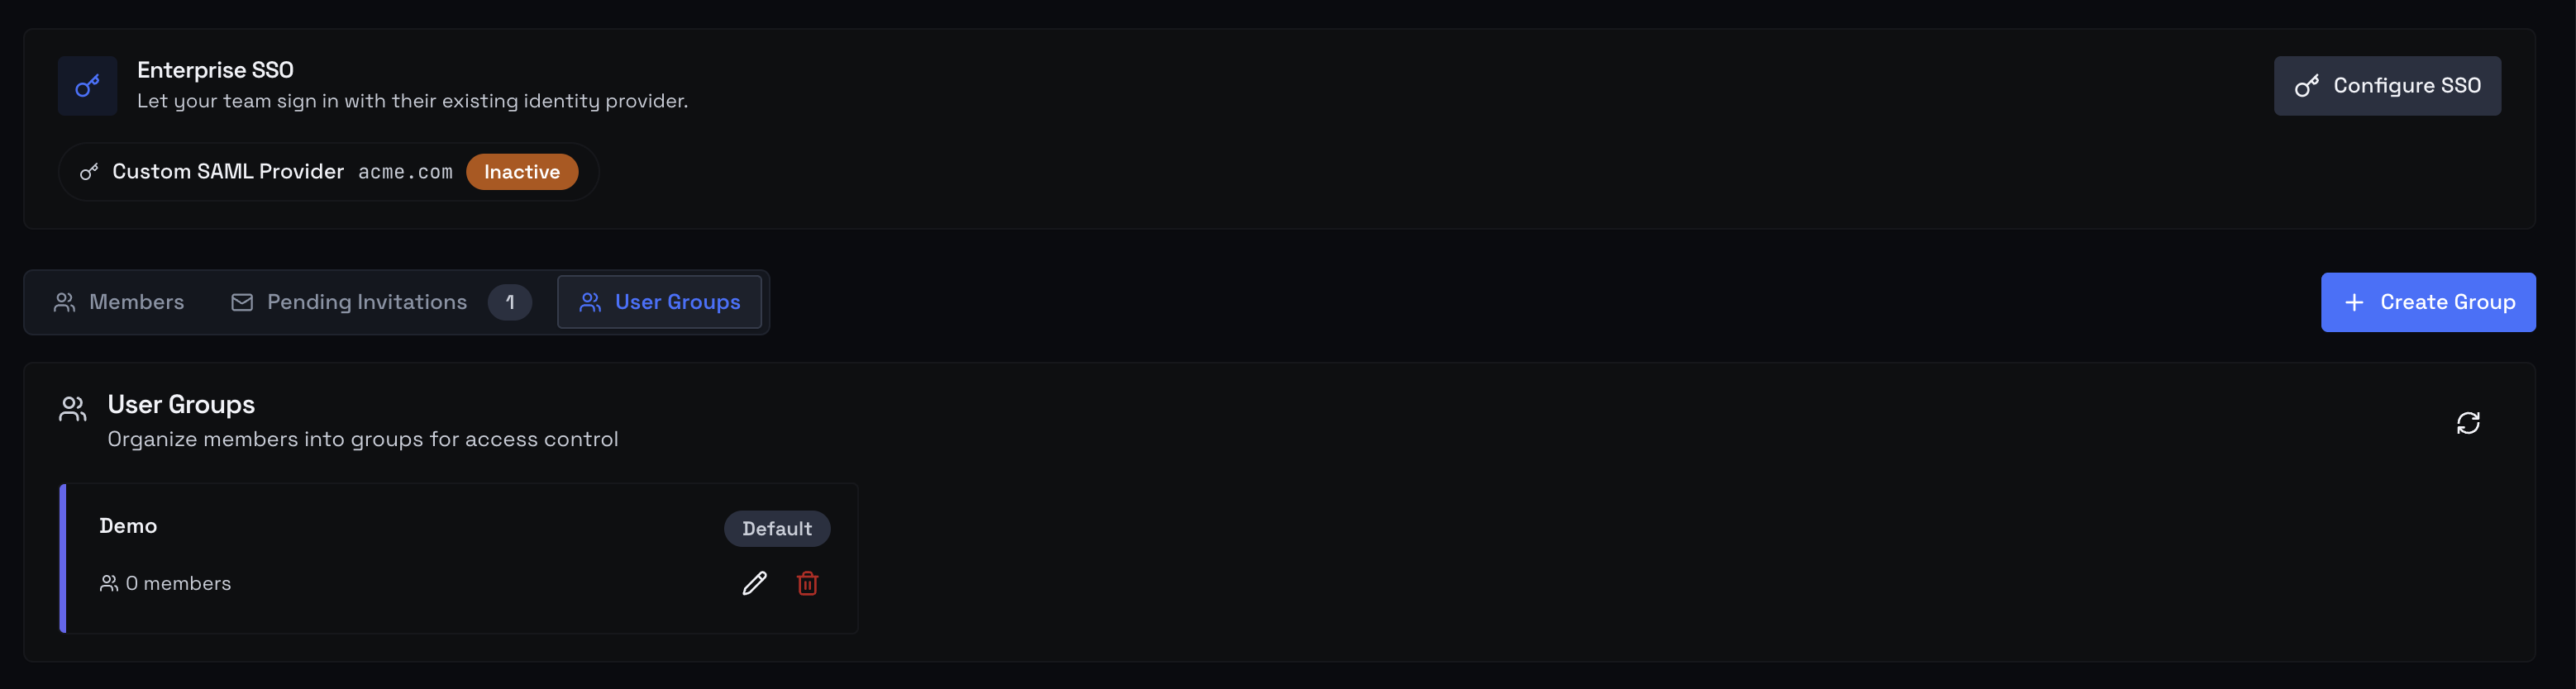 User Groups tab with the Create Group action in the top right
Switch to the User Groups tab and click Create Group (top right). The group editor opens as a three-step wizard with a progress strip across the top: Details → Clusters → Members.
2a. Step 1 of 3 — Details
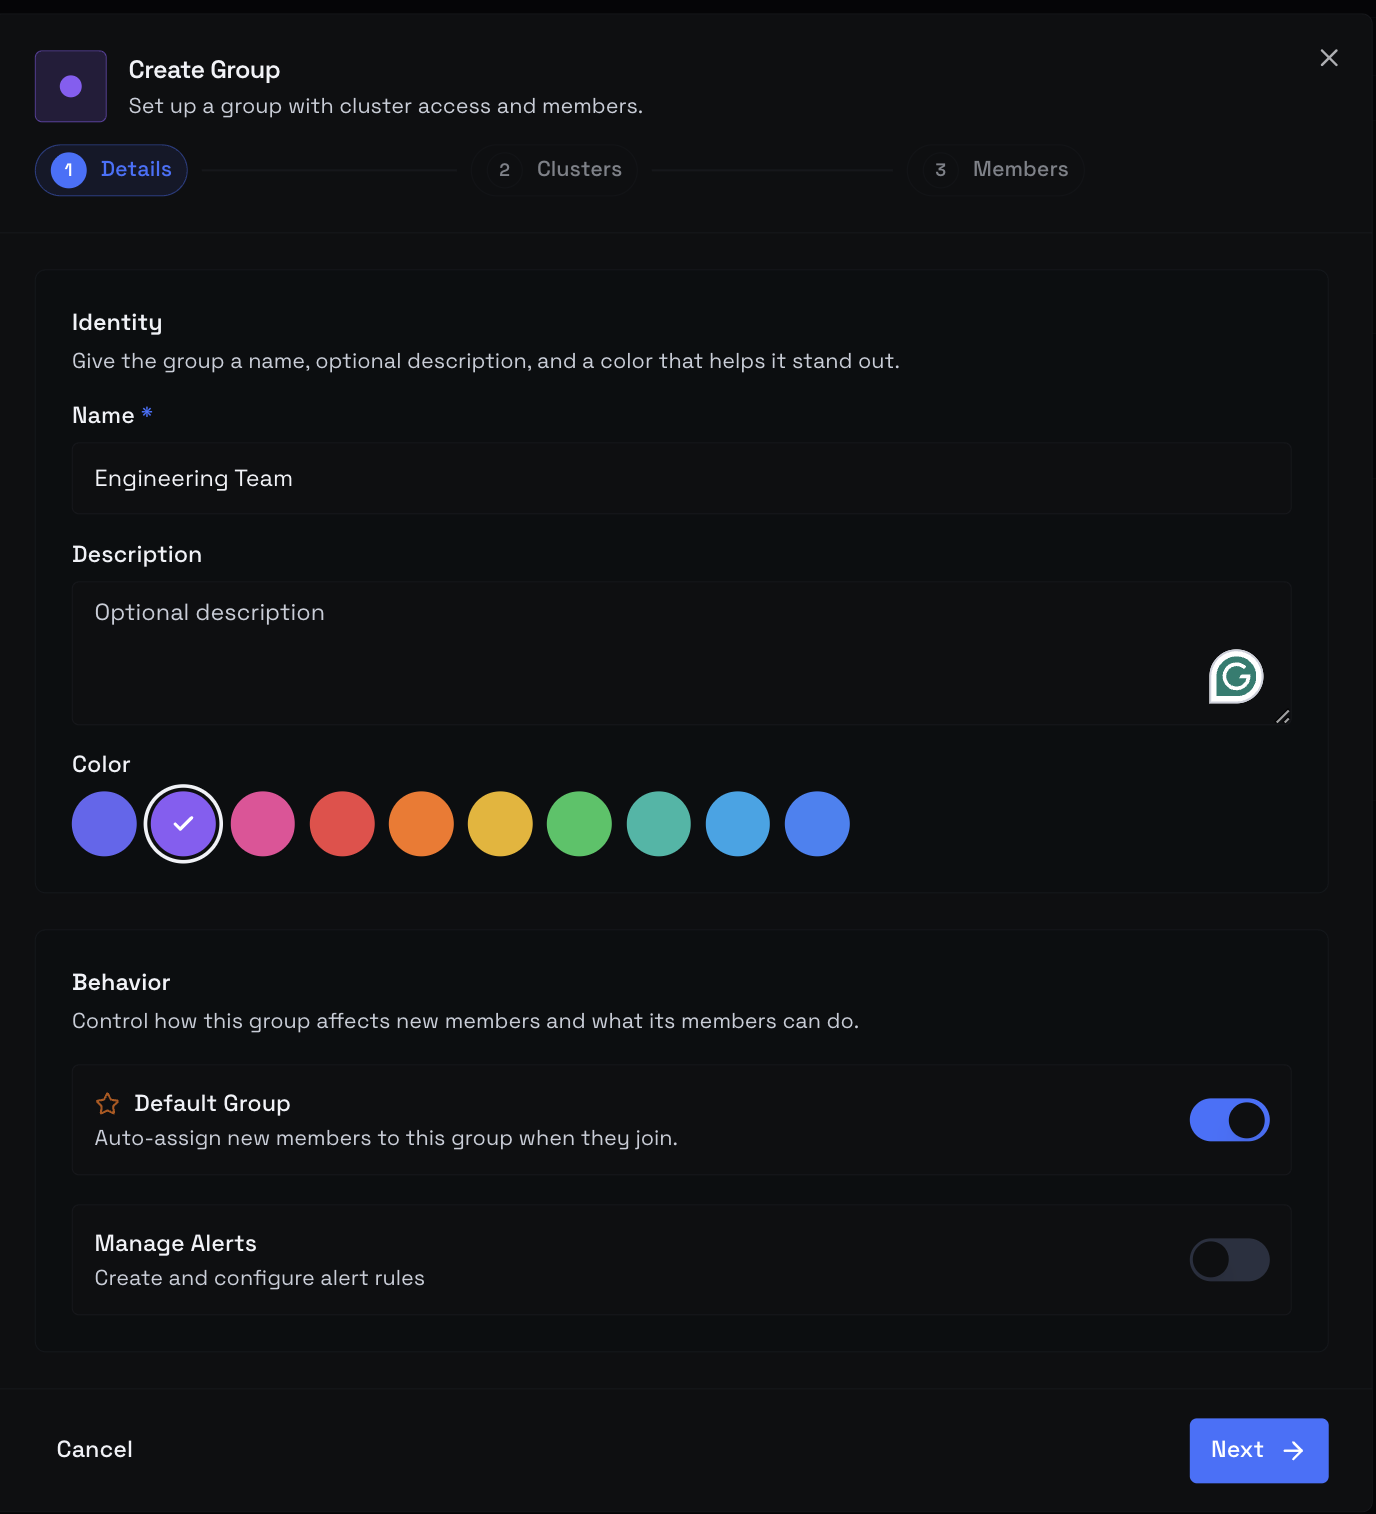 Create Group wizard, Step 1 — Details with name, description, color swatches, Default Group toggle, and General Permissions checkbox
- Name — required, up to 255 characters. Shows on the group card, on member rows, and in the invite dialog.
- Description — optional, up to 1000 characters. Surfaces under the group name on the card.
- Color — pick one of ten swatches; the dot identifies the group everywhere it appears (chips, cards, member rows). Default is indigo.
- Default Group — when on, every new invitation auto-ticks this group in the invite dialog. Use it for an org-wide baseline (e.g., "Everyone — Read-only"). Leave off for scoped groups.
- General Permissions — org-wide capabilities that apply to every Member in the group, regardless of cluster. Today this is Manage Alerts (create and configure alert rules). Toggle on for ops-heavy groups, leave off for finance/read-only groups.
Name is the only required field — everything else has a sensible default. Click Next.
2b. Step 2 of 3 — Clusters
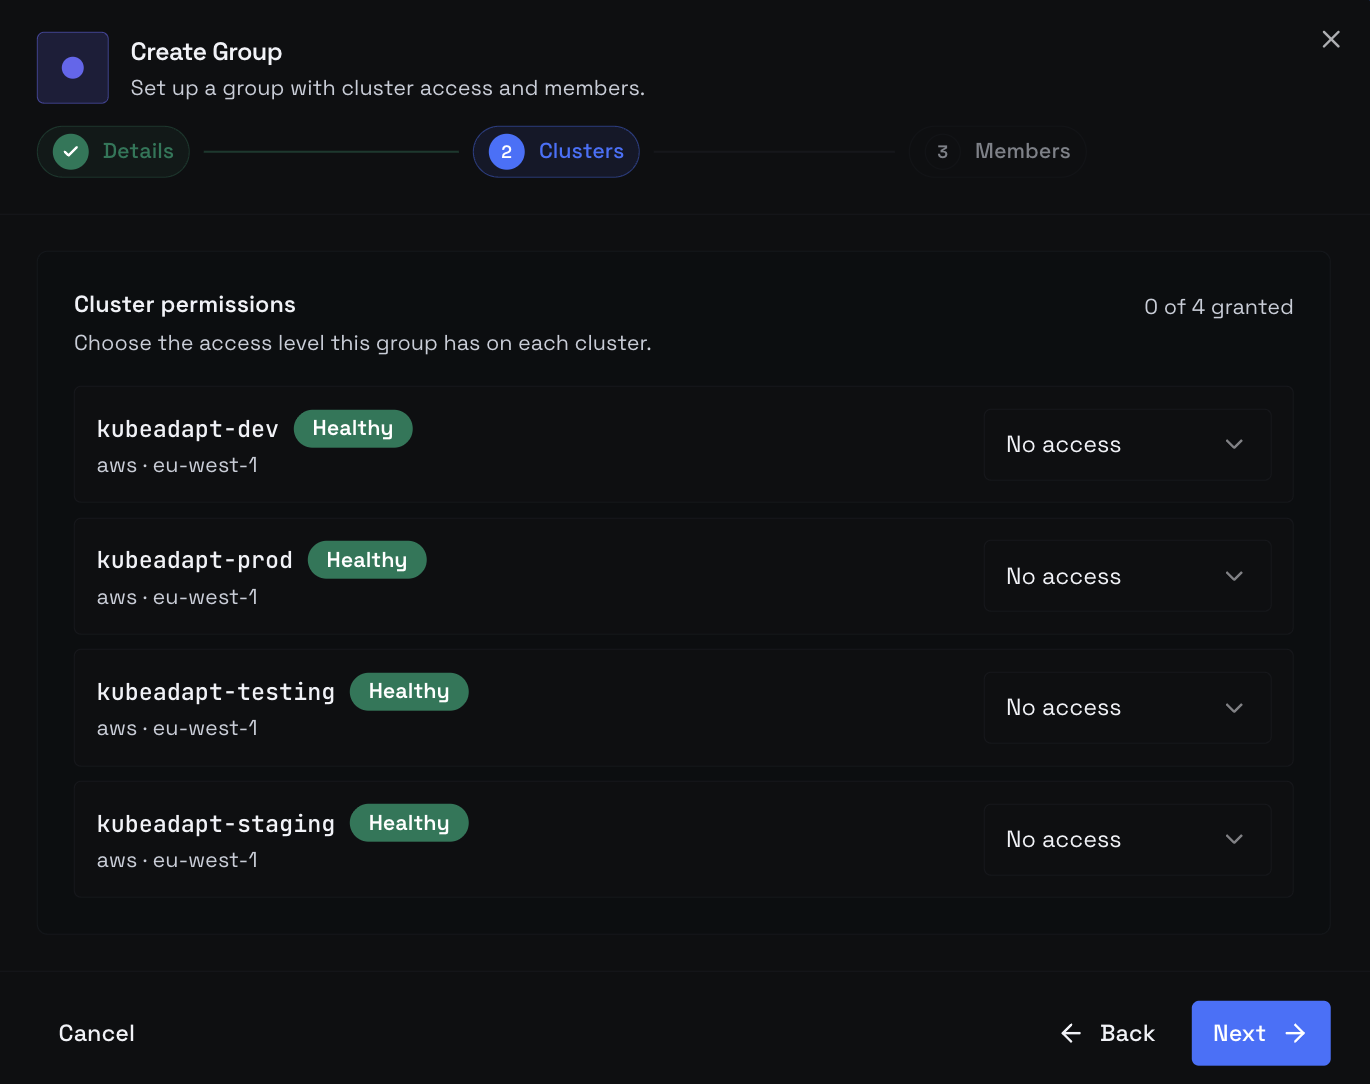 Create Group wizard, Step 2 — Clusters with a permission-level dropdown per cluster: No access, Viewer, Operator, Admin
For each cluster connected to the org, pick a permission level — or leave it at No access to hide the cluster from this group. The dropdown values:
| Level | What members of this group can do on the cluster |
|---|---|
| No access | Cluster is hidden — doesn't appear in the sidebar or any list. |
| Viewer | Read dashboards, exports, and reports. No writes. |
| Operator | Everything Viewer can do, plus acknowledging alerts and acting on recommendations. |
| Admin | In-cluster admin: edit dashboards, label keys, alert rules. |
The picker is cluster-by-cluster on purpose. A single group can mix-and-match — Viewer on prod, Operator on staging, No access on the experimental cluster. If no clusters are connected yet, this step shows an empty state; come back after you've onboarded a cluster.
Click Next once each cluster you care about has a level set.
2c. Step 3 of 3 — Members
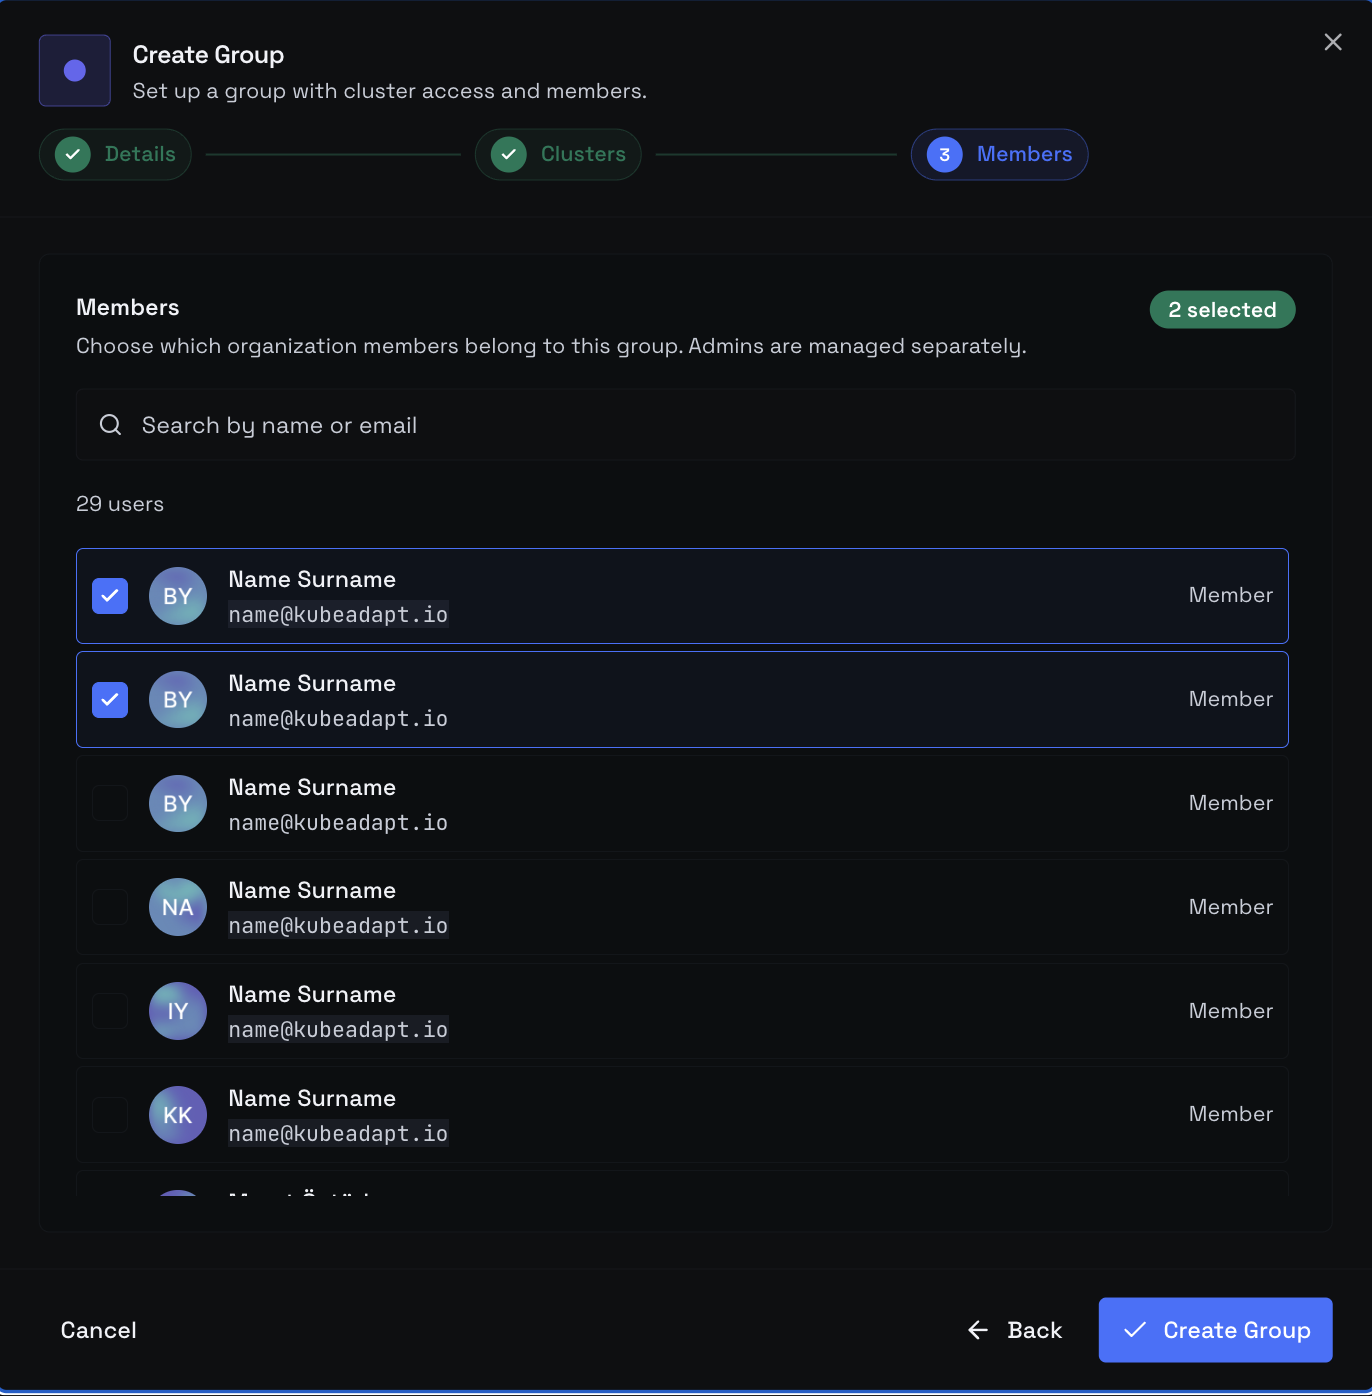 Create Group wizard, Step 3 — Members with searchable, paginated picker of eligible (non-admin) members
Pick which existing members go into this group. The picker is searchable (name or email) and paginated five per row. Selected members get an accent border; existing members already in the group carry a small Current badge.
Only Members appear here. Admins are excluded by design — they already have full org access and don't need group scoping. If your org has only Admins so far, the step shows "Invite members to your organization first. Admins are not assigned to groups." That's fine — you can skip the picker entirely and add members later, either by editing the group or by ticking it from inside the invite dialog itself.
Click Create Group. The dialog closes and the new group appears as a card on the User Groups tab with its color stripe, name, description, and member count.
3. Invite a member
 Invite Member dialog showing email field, Member/Admin role buttons, and a chip-style picker of groups for the Member role
From the Members or Pending Invitations tab, click Invite Member (top right). The dialog opens with three pieces:
- Email address — where the invite link goes (
colleague@company.com). - Role — two big buttons, side by side: Member (default) and Admin.
- Add to groups (Member only) — chips for every existing group with the group's color dot. Default groups are pre-ticked; click any chip to toggle it.
The role choices:
| Role | What they get |
|---|---|
| Member | Access scoped through the user groups they belong to. Cannot manage members or org settings. |
| Admin | Full access across the org — members, clusters, billing, SSO. Skips groups entirely. |
If you pick Member: at least one group chip must stay selected — Send Invitation is disabled until it is. If no groups exist at all, the dialog tells you so and refuses to continue; close it, create a group (step 2), and come back.
If you pick Admin: the dialog replaces the groups picker with a small note — "Admins have full access and are not assigned to groups" — and the picker disappears.
Click Send Invitation. The row lands under Pending Invitations with email, role, and (for Members) the chosen groups. The recipient gets an email with a one-time link valid for seven days; resend from the same row if it expires.
4. Verify
 Members tab listing accepted users with their role and the colored chips for each user group they belong to
Once they accept and sign in, they appear under Members with their role and group chips. Spot-check:
- An Admin signs in and sees every cluster in the sidebar with full mutation rights.
- A Member sees only the clusters where at least one of their groups granted access; each cluster opens at the permission level resolved from their group memberships.
- A Member whose groups all left every cluster on No access lands on the org dashboard with no cluster data — the right signal that you forgot to grant access in step 2b.
If something's off, edit the member from the Members tab to fix their role or group memberships, or edit the group itself from the User Groups tab to adjust per-cluster levels or the Manage Alerts toggle.
Next steps
- Configure SAML SSO — replace email/password sign-in with your identity provider
- Limits and quotas — per-plan caps on member count and clusters
- Cost attribution overview — pair user groups with cost-attribution teams for end-to-end ownership